
Do you have a NAS at home or in your office and would like to use it with Dropbox? Dropbox’ desktop app unfortunately doesn’t let you use it anywhere outside your local harddrive, let alone a folder on a shared network drive.
I tried to use the Dropbox App that was shipped with my WD My Cloud EX 4 (affiliate-link). But unfortunately, this app was not really working. It downloaded my files from Dropbox’ servers but was not able to upload any new files stored in the Dropbox folder on the network storage. So I had to find another solution for using Dropbox on my NAS.
Since I am using Windows in German, the screenshots are in German too. But you’ll probably figure out how to setup Drobox on your NAS even in a foreign language :-)
How to trick Dropbox into using a network drive
When installing the Dropbox desktop app, you’ll quickly notice that it does not allow itself to use a folder on a network drive. Only drives from the local harddrive are allowed to host a Dropbox folder. At the end of this article, you’ll be able to outsmart Dropbox’ installation routine. The only things you will need is a network drive or NAS in any form (obviously), some free hard disk space on your local machine and administrative rights for your Windows machine.
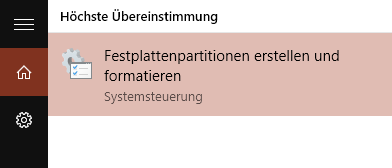
1. Change the drive letter for the target
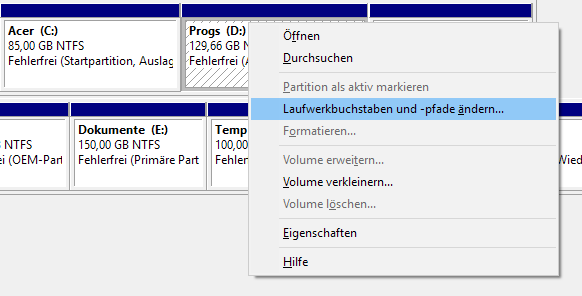
You might already have an idea, which drive letter your Dropbox folder should be installed to. If not, now is the time to make decisions :-)! The first thing you are going to do is changing any hard drive partition’s letter to the future drive letter of your Dropbox folder. As an example, I took the letter N:\.
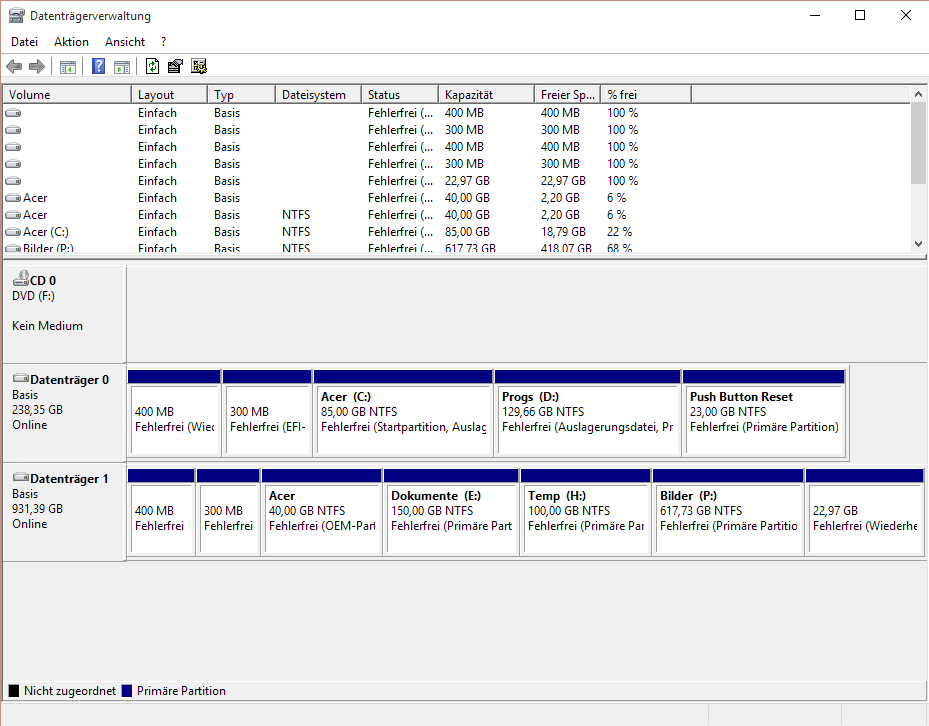
N: to it. If there’s already an existing drive N:, you would have to change that letter to something else in advance. If you already have any other drive, where temporarily changing the assigned drive-letter is not too risky, you could change that one to N:. But be warned: You will not be able to change the drive letter of the C:-drive (where usually Windows resides) and any other hidden drives. In case of some Windows bug’s reason you might be able to – you should not do so!
Eventually, you have your drive N:\ (or whatever you chose) ready for setting up your Dropbox.
2. Install the Dropbox app
Second, you will install the Dropbox desktop app. Choose the drive letter you created in the first step as target and let the Installer do its work. Upon completion of the installation, the Dropbox app will ask you for login credentials or to create a new account. Go ahead, log in and let the magic happen.
As soon as the Dropbox app is ready, close it. There’s no need to download all you files at this moment. So skip that process and make sure that Dropbox is not running anymore. Check for its icon in the taskbar next to Windows’ clock – if it’s still there, right click and close Dropbox. It is essential for the next step, that Dropbox is not running in background! To be safe, you could also check Windows’ task manager for any process named Dropbox and close it the hard way.
3. Change back drive letters and connect as network drive
Third, you return to Windows’ disk management tool and re-assign the drive’s original letters. If that’s not possible at this moment, reboot your machine. But remember to close the Dropbox app again, after rebooting. Usually, it will automatically load on Windows startup.
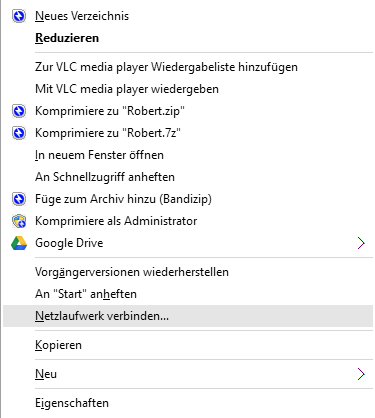
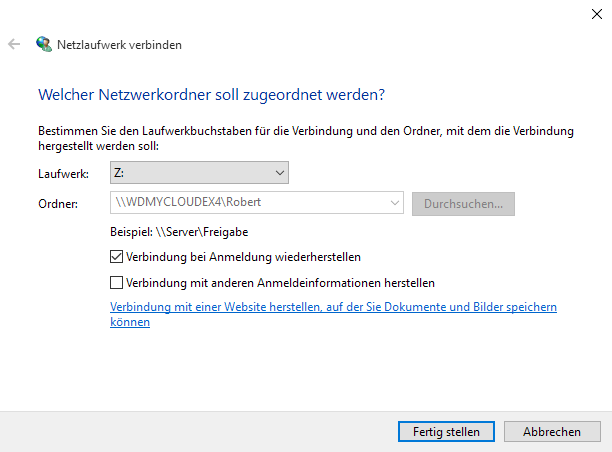
Now you can connect the network-folder on your NAS as a network drive, for which you choose the drive letter you installed your Dropbox with. Right-click on the designated (network) folder in your Windows explorer and choose “connect as network drive“. You could also go through Windows explorer’s menu and choose “Connect network drive” and enter the path manually.
Important: You should activate the checkbox to “reconnect this drive upon login” (or whatever it says in English). This way, Windows will always try reconnect this folder as the drive upon startup when it is available.
Now you should create the subfolder, you placed your Dropbox files in – by default it is named “Dropbox”. When you now start the Dropbox app, it starts syncing and will begin to download all your Dropbox files to your NAS.
When your NAS is not available
While you’re on holiday using your laptop, or in case you switched off your NAS on purpose, it will not be available for Windows to connect to. Obviously, the Dropbox app will not run properly then. It will tell you, that it cannot find its folder and asks you to choose another folder to use as local Dropbox copy. But you do not want to do that. Just hit “abort” and everything is fine :)
You won’t be able to use Dropbox’ local files when your not in you local network. But you could still use
Dropbox’ website to download indiviudal files.
NewLife says:
Das funktioniert nicht die Dropbox sagt es darf keine Speicherordner auf einem Wechseldatenträger geben!
robst says:
Hallo,
genau das ist die Standard-Antwort von Dropbox. Deshalb musst du ja Dropbox austricksen, wie in dem Artikel beschrieben.
girardelli says:
Works very well. But you do not need to make the partition on your main drive. Just hooking up a USB drive is sufficient because dropbox allows you to move its folder to USB drives.
– So rename the USB drive to the drive letter you plan to use as your network drive
– activate dropbox and immediately close it when it start syncing
– rename the USB again to its old name
– mount your network folder with that name
– I also moved the dropbox system file from the USB drive to the network folder
– restart dropbox and it will treat the new drive letter as before and start using it as you want.
robst says:
Thanks for this tip, Girardelli.
Jono says:
and for robst,
thank you very much for a brilliant idea
i was frustrated and had already urged my wife to switch to 1 drive or google, but she wouldn’t moved
so, you’re kind of saved my marriage ;)
Jono says:
Hi girardelli,
i tried it and it worked but only with the
properly sized external drive (i used seagate 1 TB)
my first attempt was with a old 256 MB microsoft thumb drive (flash disk) and it didn’t work
i’m not sure if the size was the issue (i set the small thumb drive as NTFS)
but since it’s working i didn’t made more attempts :D
thanks for the tips it helped a lot not to have to resize the partition of my OS drive
samyandreas says:
Hello
I did try this method. It worked (from renaming and so on. to connecting the new Dropbox on the network folder)
BUT Dropbox is saying : No access to Dropbox folder.
And it does not synchronize anything.
John B Hughes says:
Thanks for the tip.. worked first time :-)
JMo says:
Try this version: Connect your NAS drive via Raidrive and as a “local drive” (possible in the pro-version of raidrive).
fasan says:
Hello
Dropbox worked until yesterday with files on the NAS.
After a reboot I had to reconnect to dropbox.
Then the message Dropbox can’t start – reason drobox is on a network share drive.
I tried the workaround how described.
First dropbox started to synchronise to the “fake” drive.
Then after change the drive to the NAS it don’t works
dropbox don’t start an show the same error message as above
any ideas – many thanks
ghillsau says:
I dont like the sound of that re @fasan! Any comment @robst or @girardelli. I am looking to set dropbox up on my Networked USB disc.
Regards and thanks to all.
Arjan says:
I have one sparingly used computer which dual boots Windows 10 and Apple OS (Hackintosh). Since Dropbox free is limited to 3 installations now, I needed to be a little creative to get the files on those systems as well.
When you try moving Dropbox to a network drive, of course it will say no (because you will break their TOS). So to put the files up on a networked drive, I wound up installing a file sync client (SyncBackFree, I use Pro at work so am familiar with it) to synchronize it to the network drive.
This does require a ‘normal’ Dropbox installation on one of your computers, and that computer will sync to the network drive.
gr8bkset says:
Before going on vacation, copy the contents of the networked Dropbox to the local drive, disconnect the network drive, then reassign the local drive name to match that recognized by Dropbox.
After vacation, copy local Dropbox back to network then reassign names again.