
I tried to re-install my favourite running tracking application and failed, I just wouldn’t stop getting Internal Server Error 500. I quickly figured that I would have to look into the error logs to actually see what is going wrong. But that’s not activated by default, so I had to enable PHP error-logging manually.
Of course, I thought that the Internal Server Error 500 might be caused by some errerous entry in the .htaccess-files. So I tried to change the redirecting directives, but that didn’t help. In this situation, I could only find any hints on what was going wrong inside the error logs. But on A2’s shared hosting account (referral link), you don’t have access to the Apache error logs or the Apache configuration – which perfectly makes sense for shared hosting. How to get the error logs then? Since I could find where to activate them in the first run, I opened a support ticket.
The support team answered fast, as usual, and sent me to their Knowledge-Base article on how to enable PHP error logging using a .htacces file. Tried this, too – but now I got Server Error 500 on every single page or file that I tried to access. Darn! That didn’t lead me anywhere.
There was nothing left for me to do except clicking deeper through the cPanel. I was sure that the must be a changeable setting to activate error logs in general and enable PHP error-logging in particular. Eventually, I found the solution.
How to enable PHP error-logging on an A2 Hosting shared web host
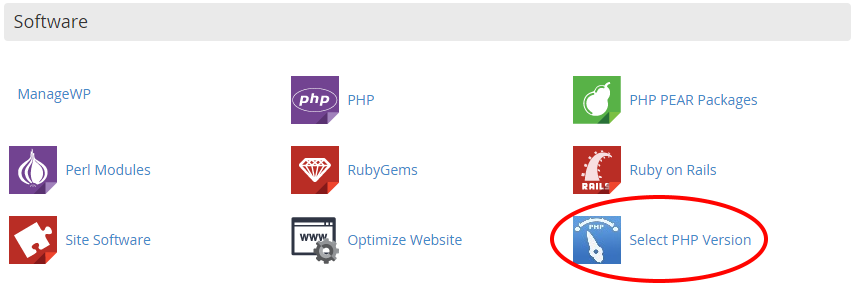
Scroll down to “Software” and click on “Select PHP version”
Login to your cPanel account. On the front page, scroll down to the software section and click on the Select PHP version button.
On the following page you can change you PHP version (if you like to) and see the currently installed PHP extensions. They could be installed (and uninstalled) by ticking the corresponding checkboxes. But that is not what you want (now). Instead, you’ll click on the link named “Switch To PHP Options” at the upper right corner of the extension list.
Changing the PHP variables for PHP error logging in cPanel
On this page you can see and change some of the standard PHP-Options. Besides changing the memory_limit, the upload_max_filesize and other variables, you can alter the setting for PHP error-logging. To change the variables, simply click on the value in the list.
First of all, set the error_logging-variable to On. Simple as that. Second, you have to specify a path where the error log should be written. The path follows your server’s realpath. I guess, since you found that page, you’ve already SSH-ed into your account and kinda-know what I am talking about. Your error log’s path will start with /home/{account-name}/, where the account-name is your account’s path-name on the server. But this variable also needs the filename specified.
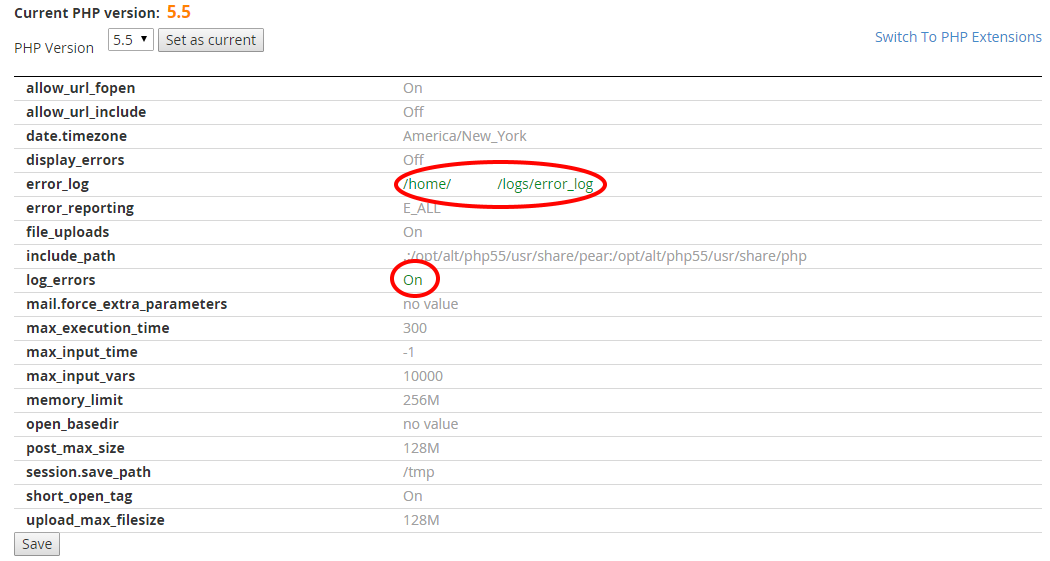
Enable PHP error logging by changing it to On and specifying a path/filename for your log.
I chose to store the error log in my logs/ folder and gave it the name error_log. After saving these setting, error logging worked!
Create folder and file in advance
Before you can read the error log, make sure that the specified folder and file exist. If they don’t, just simply create them via FTP or SSH. Both file and folder probably need to be chmod`ed 0755 to be writeable by your webserver. I am not sure but I would doubt that the webserver will create path and file by itself.